Posts

Showing posts from 2021

Our Family Celebrations Wooden Sign

Image
A few years ago I started to see signs that said "Family Celebrations," "Family Birthdays," "Our Celebrations" and a few other such combinations.  I loved these signs a lot but of course it was something that looked like I could make for cheaper than purchasing.  So, of course, I decided to make my own! The board I got from Michaels.  The hardware and hearts and circles are from Hobby Lobby.  I painted the background of the board with pavement acrylic paint, the circles with teal and white acrylic paint, and the hearts with cardinal red acrylic paint. Once the background was dry I typed up the phrase I wanted on the board and sized it for the board.  After printing it out I placed the "Our Family" where I wanted it and using tracing paper traced it onto the board.  I then placed "Celebrations" on the board where I wanted it and traced it with tracing paper.  I did them separately because I wanted them to overlap.  I painted them and whi...
DIY Postcards 2 - Fall Edition

Image
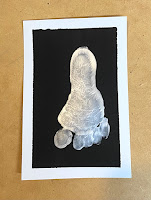
I love making postcards and it’s made even better when anything Autumn is included.  This Autumn is sweet boys first autumn so of course it’s even more special and what better way to celebrate than to use his footprints and handprints to create autumn postcards.   I began by taping the postcards with painters tape and painted the background colors on each of the postcards.  I made two of each because honestly, why not.  If your going to struggle to paint with your baby, might as well make it worth it.  Once the backgrounds were dry I gave sweet boy some Cheerios and got to painting his feet with him in his high chair.  It went pretty quickly, only struggling with his hand prints. Once I had his prints and got him all cleaned up, I let them dry and then added some embellishments. The best part about making two of each is that I can keep one of each for his scrapbook and send the others to his grandparents and uncles to share the Autumn and baby love.  

“Please Don’t Feed the Animals” Sign

Image
Now that my little one is old enough to eat Cheerios, I am finding them literally everywhere. I don’t know how they end up down his onesie and make their way into his diaper by the handful but they do while dropping out of everything constantly. We spend most of our time in the living room with a baby gate around the room.  Sweet baby ends up looking like a caged animal, even more so with his puppy prowling around. It’s so adorable.  The more Cheerios he has on the floor around him while biting the gate the more I think “Don’t Feed the Animal.” As I continued to think and say “Don’t Feed the Animal” I began to look for cute signs that had that saying but I couldn’t find any!?! That was completely unacceptable.  So I made my own. I started with a wooden sign from Michaels and typed up what I wanted the sign to say in Word.  I played with the fonts and font sizes until I liked how it looked.  Once I had it printed out and taped together I used transfer paper ...

Mexican Chicken Casserole

Image
There is always that one dish that just defines your childhood and this is that dish for me.  My mom got this recipe from a friend long before I was ever born but it was always a favorite growing up and continues to be now that I am grown. This dish has it all, cheese and Doritos.  Seriously who could ask for more.  Its warm and inviting and was always my go to request for my birthday dinner.  It's so very simple and requires just a few ingredients. Shredded chicken which you can do ahead of time or you can get a rotisserie chicken and tear it up to make life a little easier. Then its crushed Doritos chicken broth, cream of chicken soup, sliced pimentos, and shredded cheese.  It all comes together in a spicy gooey deliciousness.  Seriously I can't stress it enough this is my all time favorite comfort dish!!!   Ingredients: 2 Cans of Cream of whatever soup 1 Can Chicken Broth 2 TBSP Chili Powder 1 TBSP Ground Cumin 2 Tsp Pimientos 4 Chicken Breasts...

Grandkids Make Life Grand Wooden Sign

Image
Now that I have a baby (and gave my parents a grand baby) it is paramount that I start making grandparent gifts to celebrate their new parenthood, GRAND parenthood. (Lol) Unfortunately, I’m also very cheap and while there are tons and tons of cute grandparents things that I could buy they are also like super expensive. So I decided to make my own after looking at some cute wooden grandparents picture hangers on Etsy and Pinterest. I knew I wanted something that was kinda rustic and old farmhouse-ish but we also just moved so I didn’t have access to my old wood scrap pile (that stayed at our old house). So, I went to my trusty and cheap store, Michaels! The sign I chose was on sale and each section was painted differently or a different wood type so I knew once I stained it that it would look amazing. Once I had my board I was able to figure out how big I wanted my wording to be.  I typed it out in Word and then took a screenshot of it and put it into Paint because Paint allows you ...

Raspberry White Chocolate Lemon Cake

Image
This cake isn’t actually the first iteration of this cake  it started as a Cranberry White Chocolate Orange Cake born out of my desire to make some sort of cranberry bread that had orange in it.  I searched all over Pinterest and found two recipes, one for a cranberry bread with a lovely frosting and once for a cranberry orange cake. I decided to combine the two and hope for the best.  It turned out better than expected.  My husband asked me to make it 3 times in one week. And yes he did eat most of it each time. Cake Ingredients Unfortunately cranberries are not currently in season because it’s summer so I had to find a different fruit that would be just as delicious and my sweet little boy has been eating up raspberries like no other so I figured raspberries would be great especially with white chocolate.  Then the more I thought about it the more lemons came to mind.  I really like lemon and raspberries to get her so I switched out the orange for lemon a...

Love Quote Picture Frames

Image
There are so many lovely picture frames and wooden signs all over Pinterest and Etsy but I just can't bring myself to spend that kind of money on something I know I could easily make myself.  Both of these signs were inspired by images I saw on Pinterest (if I find the links I will add them later to give credit to the creator).   The first is a shadowbox picture frame that says, "Family is Forever, Love doesn't Melt."  For this one I glued snowman scrapbook paper to the back of the frame and then painted the words on to the frame with black acrylic paint.  You could totally use letter stickers but I was impatient and didn't want to go to the store.  Each Christmas I add a silver jingle bell unless it is the first Christmas with a new child and then the jingle bell is red.  I take this frame out each year for the winter season and love adding the jingle bell to it, watching the frame fill up and keep track of my husband's and my life together.  (Th...

Candy Cane Ranch Wood Sign

Image
There isn't much from my husband's childhood that he talks about so when he does talk about something wonderful and positive from that time I make a point to reinforce those memories and incorporate them into our life.  One of those positive memories comes from the time his family lived with his grandparents.  His grandparents had a small piece of land that they called Candy Cane Ranch.   Our retirement plans revolve around owning land and homesteading and once we have gone through the work of buying raw land and turning it into a hopefully self sufficient homestead we will need to name our little slice of heaven.  It obviously needs to be called Candy Cane Ranch in honor of my husbands grandparents and the love they gave my husband. But just calling our land Candy Cane Ranch isn't enough, we need a sign so I set out to make one. A sign for our future home that we can look at as we continue working towards retirement and our future.   Our previous hous...

Toddler Travel Flannel Board

Image
Flannel Boards are one of my favorite ways of storytelling and creative play for littles.  Unfortunately the one that I use for storytimes with my little one is far too big to be used anywhere but at home. Luckily Simply Darrling  has the perfect solution for a travel flannel board for littles to play with and everything stays contained! Use a DVD Case and envelopes to hold the pieces!  Genius! I went in search of an old DVD case and found an old video game case that wasn't being used anymore.  I cleaned the plastic with rubbing alcohol and then coated it in tacky glue and then glues down blue felt across the entire case, being sure the edges got plenty of glue.  I then closed the case and let the glue dry.  Once dry, I trimmed any excess felt and started on the pieces.  I chose to use blue only because that was what I had that was big enough to cover the case but you could also do whatever is your kiddo's favorite color or tan/green for the ground and...

DIY Postcards

Image
I used to think getting mail was awesome and then I became an adult with bills and mail became the worst ever, but every once in a while you get that one person who sends a card or a letter just because and it can make your whole week.  I just love it when I open the mail and have a letter or postcard waiting for me from a friend.  I love that feeling of being special enough that I wanted to do that for others too but I couldn't bring myself to purchase beautiful postcards because it seemed too expensive so instead I decided to make my own, making the happy mail that much more special. Blank Mailable Postcards  I purchased this set of blank postcards and got to creating.  I am pretty terrible at drawing though so instead I opted for acrylic paints and some amazing video tutorials on Pinterest.   For my first postcard I just painted the entire back and it looked fine but was very clearly homemade.  The next one I tried making a border around it wit...

Creating Flannel Stories at Home

Image
Farm Travel Flannel Flannels are an amazing learning tool, a great way to retell a story, and a wonderful way for children to play and learn. They are also ridiculously easy to make at home so you can have custom stories and play sets.  To begin though, you need to make a flannel board for your stories. This is very easy to do and can be made out of every day items depending on how big you want it to be.  The one that I use for storytimes is made out of a large framed canvas covered in purple felt because that is the color I had on hand that was large enough to cover the canvas frame.  However, if you will be purchasing felt I would go with a nice bright red, most pieces will stand out very nicely on that color.  The base can be a canvas frame, the back of a magnetic whiteboard (this adds a HUGE amount of variety when making or purchasing flannel pieces) cardboard or something smaller like a DVD case.  Whatever your decision for a base be sure to really glue the...

Mess-less Painting with Baby

Image
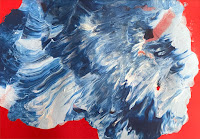
I love to craft all the time.  It’s one of my most favorite past times.  Yarn, fabric, felt, wood, embroidery floss, and paint are just a few of the mediums I like to work with.   As my sweet boy has gotten older the amount I can craft has increased because he can entertain himself for a little while but he usually just ends up staring at whatever I am doing.  The look on his face making it clear he wants to get his hands on my crafts.  One day while painting I thought it would be nice if he could paint with me but I didn’t want to make rice cereal paint because it seemed unnecessarily messing and I would never be able to keep it as his first artwork (I’m ever so slightly sentimental AND he is my first lol).  I also couldn’t just put nontoxic paint down because at 5 months he puts EVERYTHING in his mouth.  So I grabbed some paint, card stock, a zip top bag, and some painter’s tape. I plopped a few colors of paint onto the card stock and placed it in a ...

Zucchini Corn Pie

I love seasonal meals that can come directly from the garden.  This Zucchini Corn Pie is exactly that.  With minimal ingredients this is such a simply perfect summer meal. Ingredients: 4 Large Squash (Zucchini and Yellow), sliced thinly 3 Eggs, beaten 3 Cups of Sweet Corn, cooked 2 Cups Shredded Cheddar Cheese OR Cheese of Choice Desired Seasonings Directions: Preheat oven to 400F. Thinly slice squash (I used my Kitchen aid slicer attachment which made quick work of it). Beat eggs and season generously, spreading over the sliced squash being sure to coat each piece. Set aside. Cook corn and season generously. Set aside. Lightly grease an 8 inch springform pan. (You can use parchment paper to prevent the egg leaking if desired, I prefer to just roll the dice and clean the oven later if needed) Add two layers of squash to the bottom of the pan using 1/4 of the squash.  Layer with 1/3 the corn then 1/3 of the cheese.  Continue these layers ending with the last of the sq...